Getting started: choose your Nostr account setup
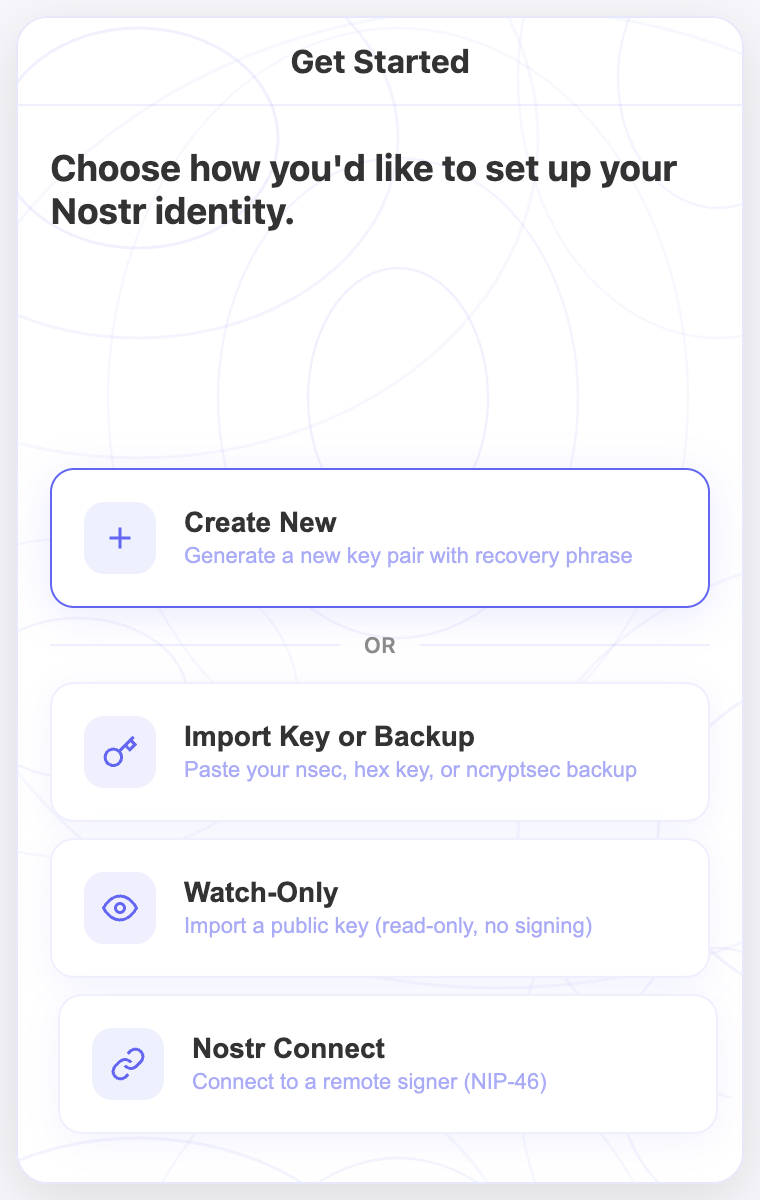
Install Nostr WoT and choose a new identity, an existing key or backup, a watch-only account, or a QR connection to an external signer.
Nostr WoT offers four ways to set up an identity. If this is your first Nostr account, start with Create New. If you already have an identity, choose the method that matches what you have.
Install and open the extension
- Open the download page and follow the store link for your browser.
- Install the extension and pin it to your browser toolbar so you can find it again.
- Open the Nostr WoT popup and select Continue to reach the account methods.
Choose your method
| What you have | Method | Follow this guide |
|---|---|---|
| No Nostr identity yet | Create New | Create an account and save your 24 recovery words |
| A private key, recovery phrase, or encrypted backup | Import Key or Backup | Restore an existing identity |
| Only a public key, and you want to explore | Watch-Only | Add a read-only account |
| An identity in an external NIP-46 signer | Nostr Connect | Connect your signer with a QR code |
Creating a new identity does not require an email address or phone number. Your keys identify you on Nostr. Importing restores the identity represented by your existing key; creating a new one gives you a different identity.
Understand what to keep
Public key (npub): identifies your account and can be shared. Private key (nsec) or recovery phrase: lets someone control the identity and must remain private. Local vault password: protects access to keys stored in this browser; it cannot replace a lost recovery phrase.
Never use recovery words shown in a tutorial or demonstration. For a new account, save the words generated by your own extension before continuing.
After setup
Open the popup and check that the public key matches the identity you intended to use. With a signing account, visit a Nostr client and review the extension's permission prompts when connecting. Watch-only accounts cannot sign posts.
Continue with identity management, site permissions, or the Web of Trust. You can set up a Lightning wallet separately when you are ready to use zaps.
Account previews and finishing setup
The completion screen puts the account summary and Get Started at the bottom. It shows the account name and a copyable public key; only derived sub-accounts are described as sharing the main seed phrase. New accounts can use global rules or copy site overrides from another account. Authentication grants stay separate.
In the extension
Screenshots use the English interface and demo accounts. Open an image to see it at full size.
Related video walkthroughs
These videos are in English.